Licenses
License Overview
Licenses allow a Zyxel Device to use optional services, such as anti-virus or content filtering.
• Trial licenses are free and allow you to try out a service before buying it. After a trial license has expired, you need to purchase the license to continue using the licensed service.
• You can buy licenses in Circle for a specific Zyxel Device, or you can buy a general license key which can be applied to a Zyxel Device later.
• You can redeem license keys for Zyxel licenses in:
• Circle for both On-cloud and On-prem modes
• myZyxel for On-prem mode only or
• Nebula for On-cloud mode only.
Finding the Correct Licenses
Click here for a full list of the supported licenses for Circle.
Buying License Keys from the License Store
The Circle license store allows you to buy license keys for Zyxel Devices, services, and software. Follow the steps below to use the license store.
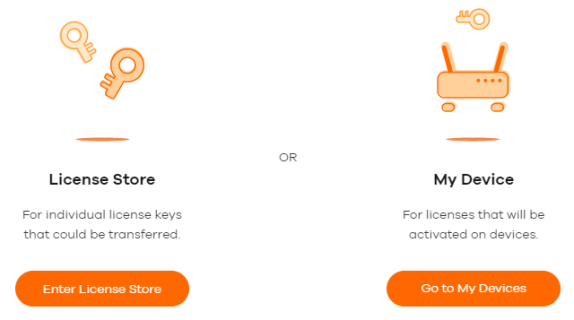
1 Go to License Store. A pop-up screen appears as follows for the first time. Choose Enter License Store to buy a general license key which can be applied (redeemed) to a Zyxel Device later. Choose Go to My Devices takes you to the My Device screen where you first select specific Zyxel Devices and then buy licenses for them directly.
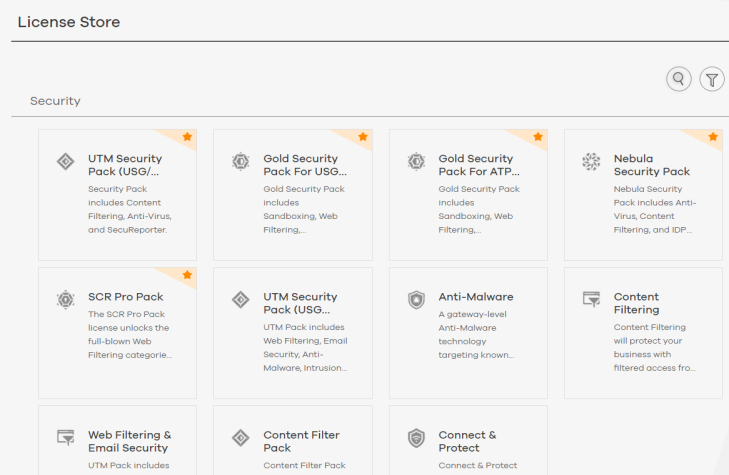
2 In the License Store screen, click Search or Filter to locate a specific license. Then click the license to view its screen.
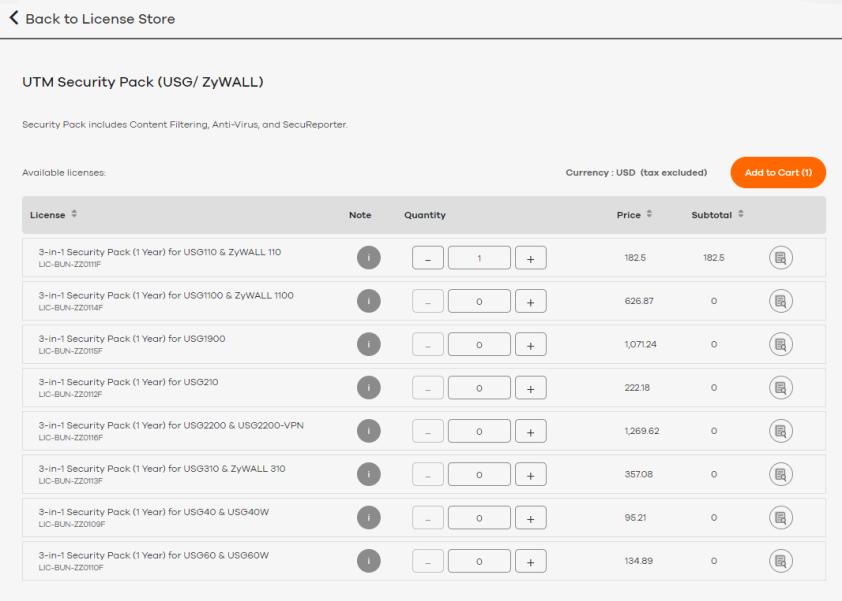
3 On the license’s screen, select the number of licenses that you want to buy, and then click Add to Cart.
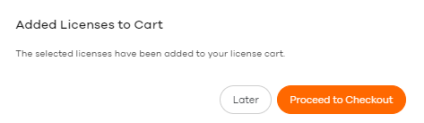
4 You can pay for the license keys now, or go back and add more licenses to the cart.
5 For details on paying for an order, see Paying for an Order.
Buying or Renewing Licenses for a Single Device
Follow these steps to buy or renew licenses for a Zyxel Device in Circle.
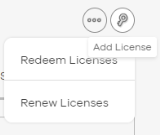
1 Go to My Devices. Locate and then click on a Zyxel Device to display the Device Information screen. Click the key icon.

2 Click Renew Licenses.
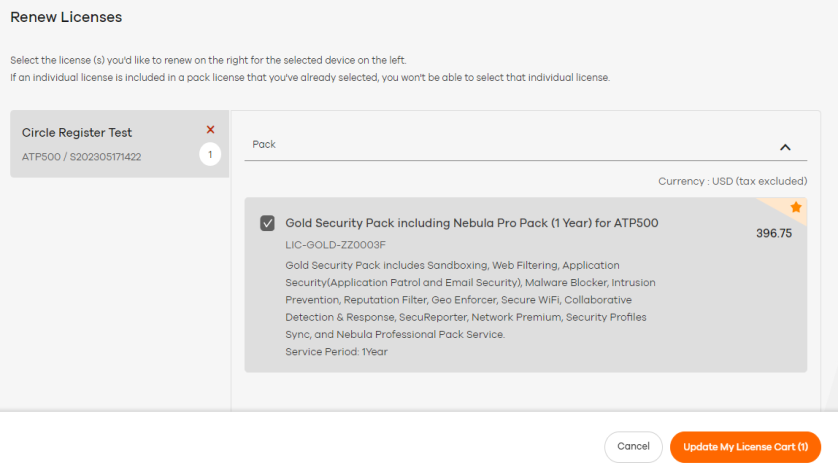
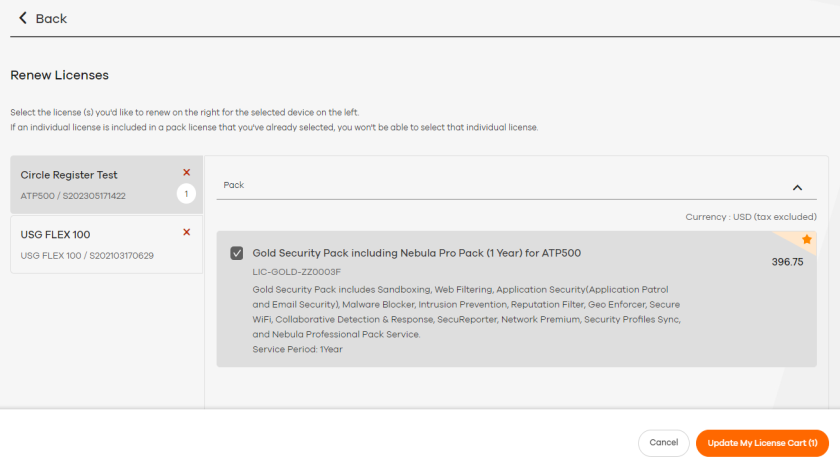
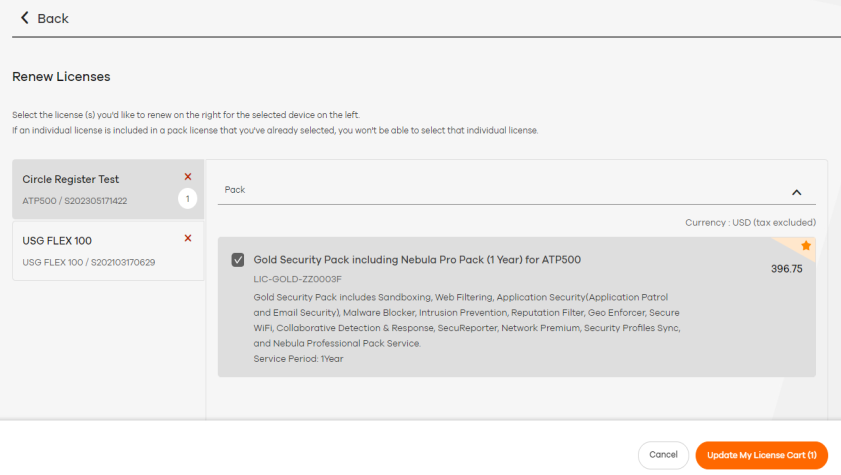
3 Select the licenses that you want to buy or renew, and then click Update My License Cart.
4 Follow the on-screen prompts to pay now or pay later.

For details on paying for an order, see Paying for an Order.
Buying or Renewing Licenses for Multiple Devices
Follow these steps to buy or renew licenses for one or more Zyxel Devices in Circle.
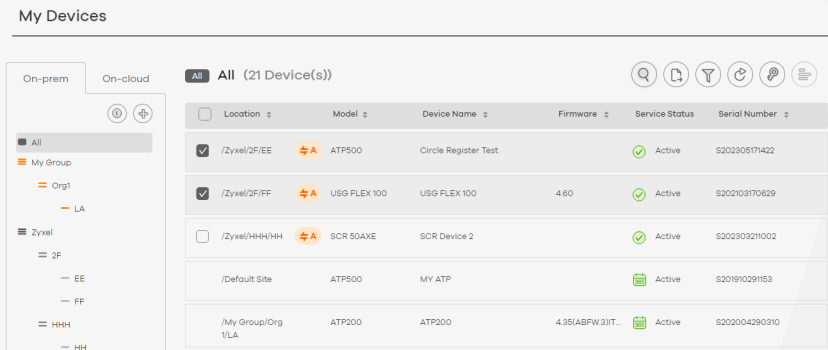
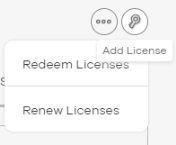
1 Go to My Devices. Select one or more Zyxel Devices, click Add License (the key icon).
2 Click Renew Licenses.
3 Select a Zyxel Device in the Zyxel Device list, and then select the licenses that you want to buy or renew for that Zyxel Device.
4 Repeat these steps for each Zyxel Device in the Zyxel Device list.
5 Click Update My License Cart.
6 Follow the on-screen prompts to pay now or pay later.

For details on paying for an order, see Paying for an Order.
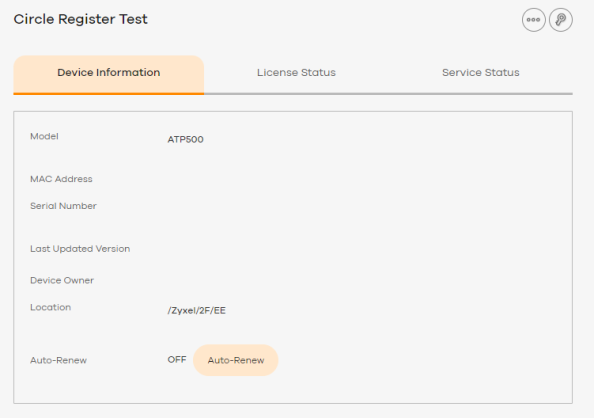
Buying Auto-Renew Licenses
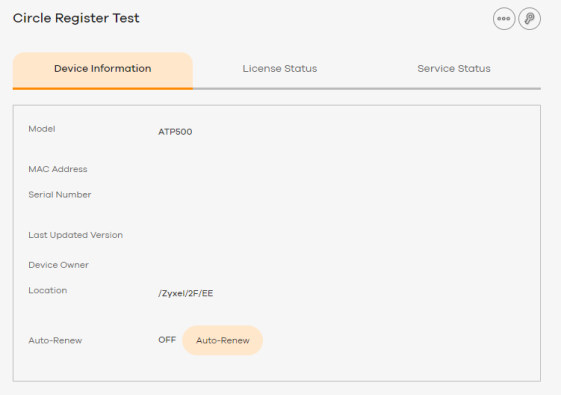
The following is an example of how to automatically renew licenses for a Zyxel Device in Circle.
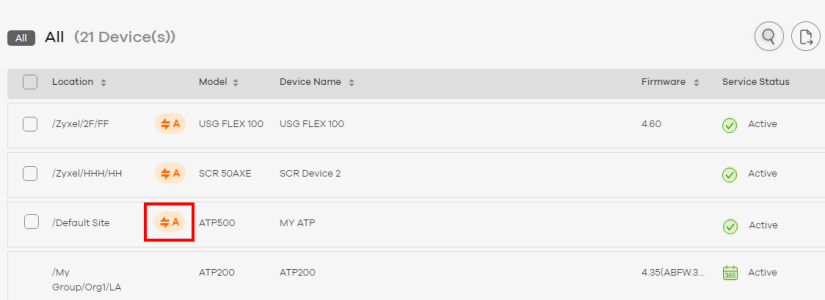
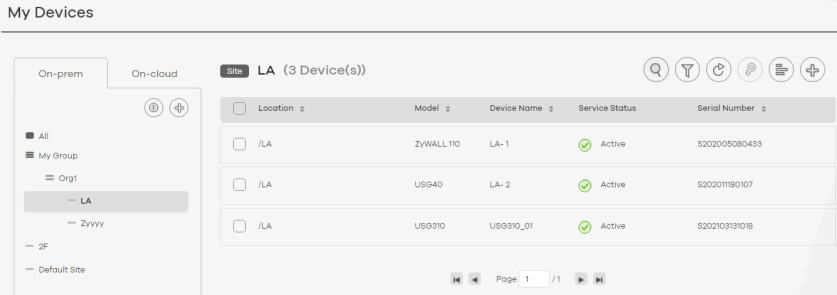
1 Go to My Devices. Click on the orange A icon (Auto-Renew) next to the model whose license you want to automatically renew. In this example, click the orange A icon next to the ATP500 to enable the auto-renew service.
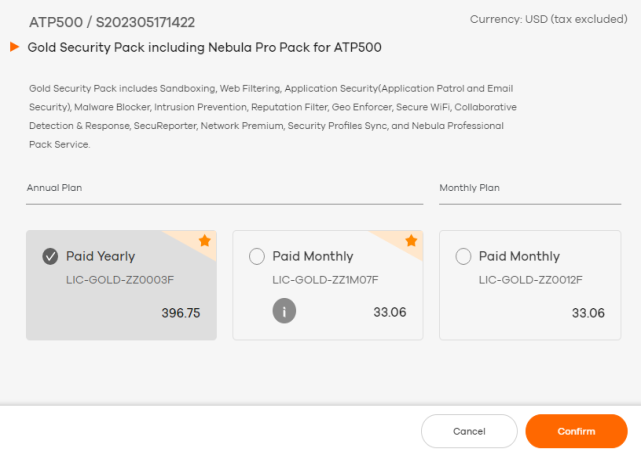
2 The following screen displays available payment options for the Gold Security pack license. Select your desired product and then click Confirm to proceed. Click Cancel if you want to go back to the My Devices screen.
• Select the “Annual Plan; Paid Yearly” plan if you want to pay the yearly fee once a year.
• Select the “Annual Plan; Paid Monthly” plan to pay the yearly fee in 12 month installments.
• Select the “Monthly Plan; Paid Monthly” plan to purchase a monthly security plan.
3 The Confirm Order screen displays. Enter a coupon code if you have one and click Apply.
4 You can leave a note for this order in the Order Reference field. This will appear in your order details for easy finding and future reference.
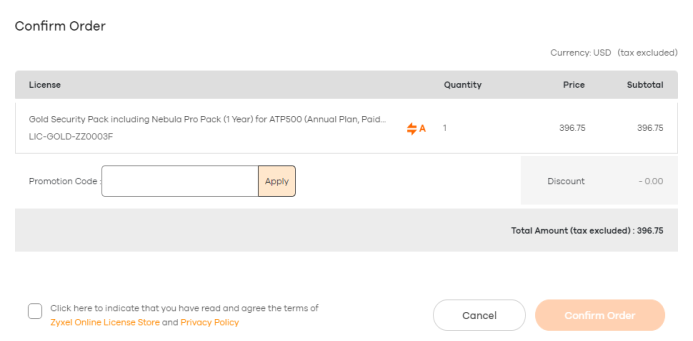
5 Select “Click here to indicate that you have read and agree the terms of Zyxel Online License Store and Privacy Policy” and then click Confirm Order to proceed to checkout.

6 The following screen appears. Enter your email address, credit card type, name, credit card number, the expiration month/year, and CVC number.

7 If your company is registered in the VAT system, click Enter VAT ID. The following screen appears, enter your VAT ID and then click Submit to proceed.
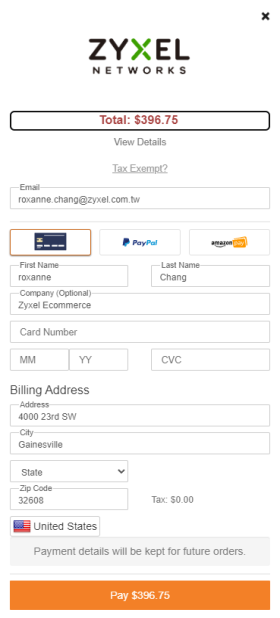
8 After entering all necessary information, click Pay to authenticate the transaction. At the time of writing, alternate payment methods, such as Paypal, Amazon Pay, Wire Transfer, and Giropay, iDEAL, Sofort, WebMoney, Airpay and SEPA are accepted.
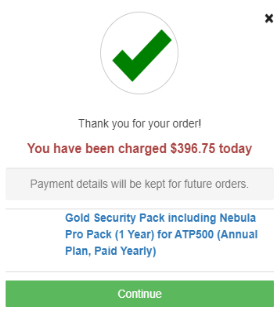
9 If the transaction is successful, the following screen will appear. Click Continue to close the window.
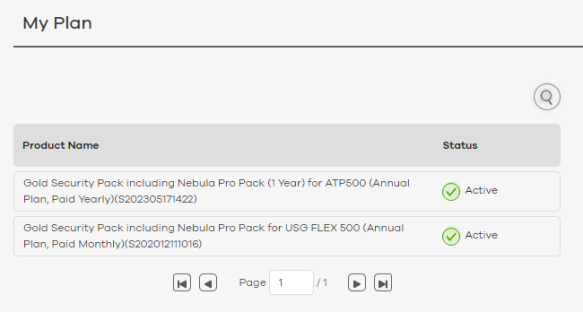
10 Go to the My Plan screen to view the details of your order information.
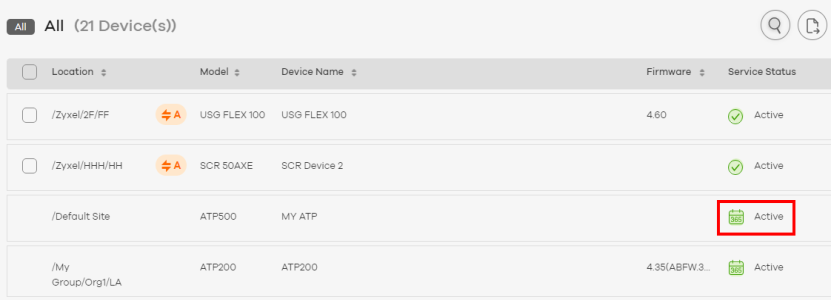
11 Go to the My Devices screen to check the updated license status. The calendar (365) icon shows that this license will be automatically renewed before expiry.

Canceling Auto-Renew Licenses
The following is an example of canceling automatic renewal of the Gold Security pack license on the ATP500.
1 Go to the My Plan screen. The following screen displays. Each plan status is as follows:
• Active: Auto-renew is activated.
• Overdue: Payment is overdue.
• Canceled: The plan has been canceled. Users can reactivate the plan before it is deactivated.
• Deactivated: Auto-renew has been disabled.
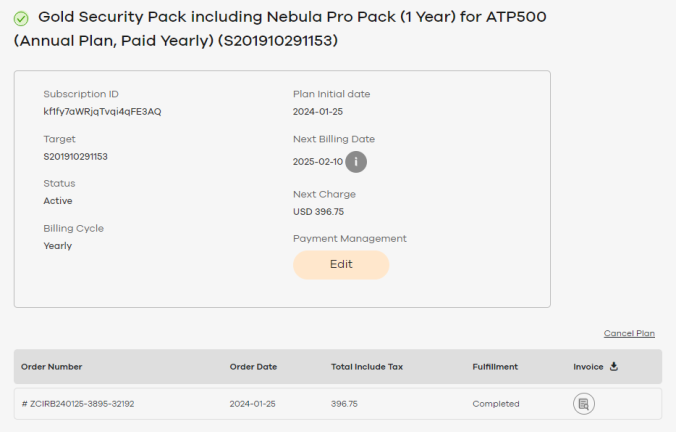
2 Click on the plan you want to cancel. In this example, click the Gold Security Pack. The following screen displays. Click Cancel Plan.
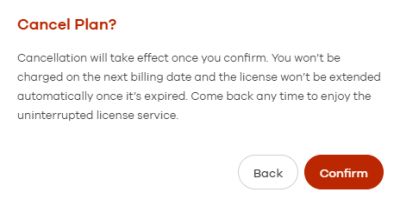
3 The Cancel Plan? window pops out. Click Confirm to confirm the cancellation and close the window.
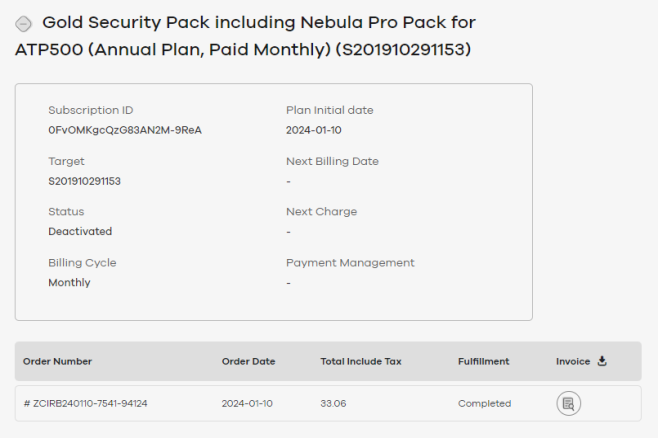
4 You can go back to the My Plan screen to check the status of the Gold Security Pack license. The status shows the Gold Security license is deactivated now.
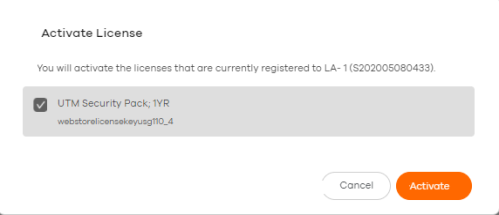
Redeeming License Keys on a Single Device
Use Redeem if you have a license that is not yet registered (linked) to a Zyxel Device. First, select a Zyxel Device, and next use Redeem to register the license to it. Circle will then automatically activate it.
Follow these steps to apply (redeem) license keys on a Zyxel Device in Circle.
1 Go to My Devices. Locate and then click a Zyxel Device.
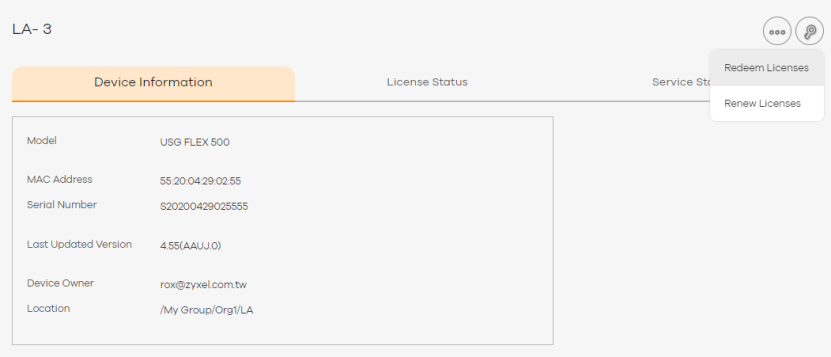
2 On The Device Information screen, click the key icon, then Redeem Licenses.
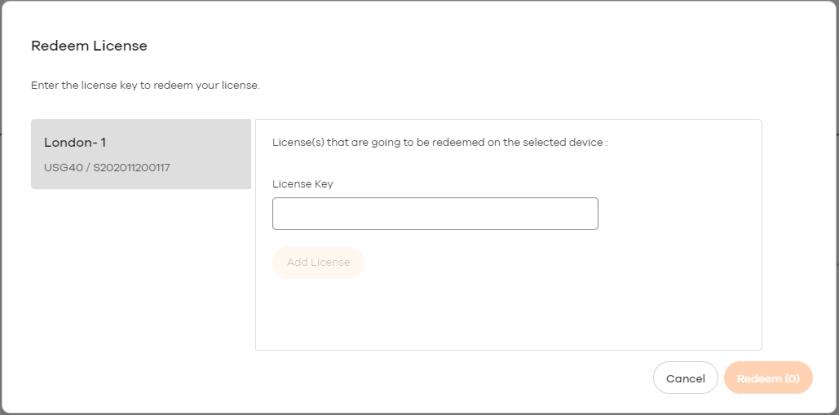
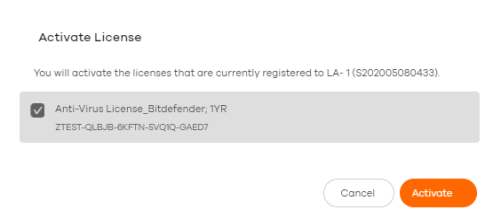
3 Enter a license key, and then click Add License.
The license is added to the list at the bottom of the window.
The license is added to the list at the bottom of the window.
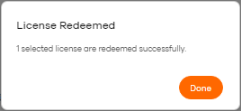
4 Repeat the above steps to add additional license keys. When finished, click Redeem.
Circle activates (redeems) each license on the target Zyxel Device.
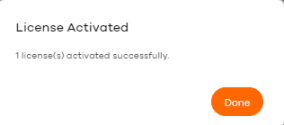
• A confirmation screen displays if the activation is successful. Click Done.
• If there are any problems with activation, for example a Zyxel Device is currently offline or is running outdated firmware, Circle displays a warning.
• If the Zyxel Device already has an activated license of the same type, then the new license will have the status Queued and will activate when the existing license expires.
Redeeming License Keys on Multiple Devices
Follow these steps to redeem license keys on one or more Zyxel Devices in Circle.
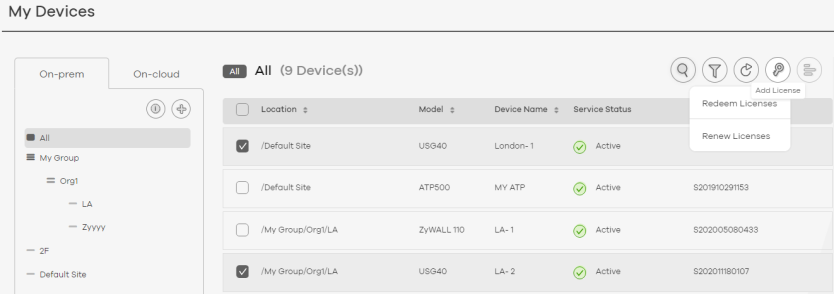
1 Go to My Devices. Select one or more Zyxel Devices, click Add License, and then click Redeem Licenses.
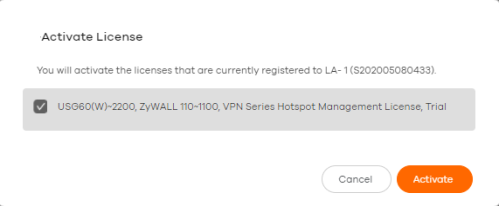
2 Select a Zyxel Device that you want to activate a license on. Enter a license key, and then click Add License.

3 Repeat the above steps to redeem additional license keys.When finished, click Redeem.
Circle activates (redeems) each license on the target Zyxel Device.
• A confirmation screen displays if the activation is successful. Click Done.
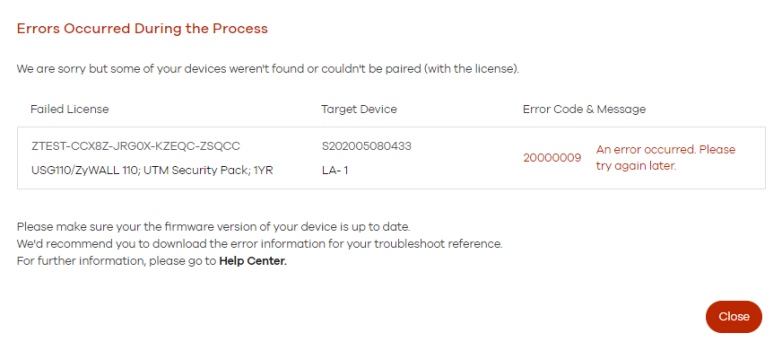
• If there are any problems with activation, for example a Zyxel Device is currently offline or is running outdated firmware, Circle displays a warning.
• If the Zyxel Device already has an activated license of the same type, then the new license will have the status Queued and will activate when the existing license expires.
Paying for an Order
Follow these steps to pay for an existing order.
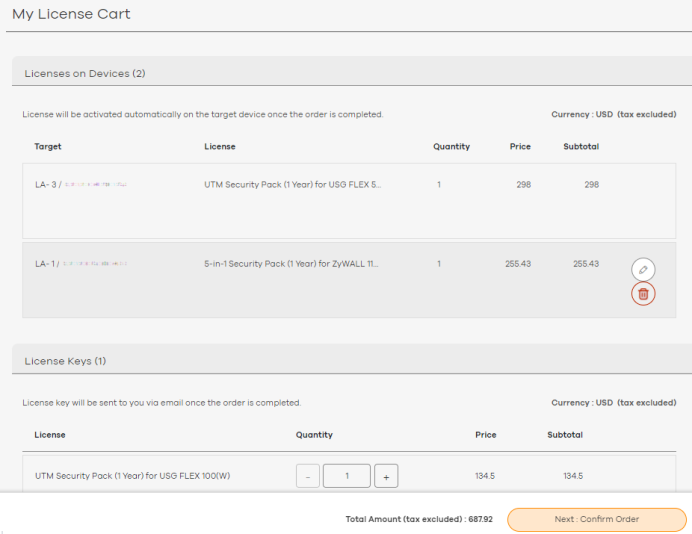
1 Click My License Cart in the Title bar. The My License Cart screen opens. You may edit or delete items in the license cart.
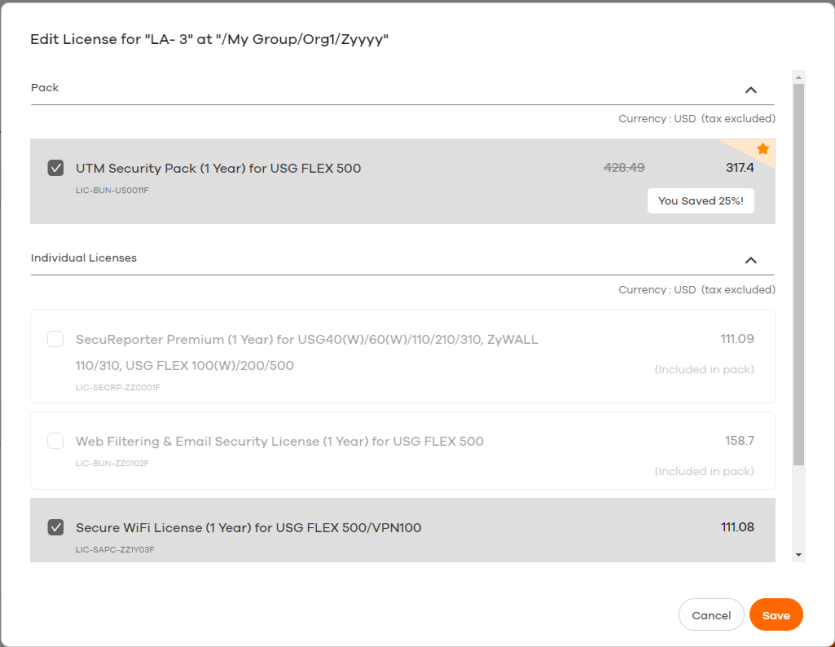
2 Click the pencil icon if you want to add or remove licenses.
3 Click Cancel or Save to go back to the previous screen, then click Confirm Order.
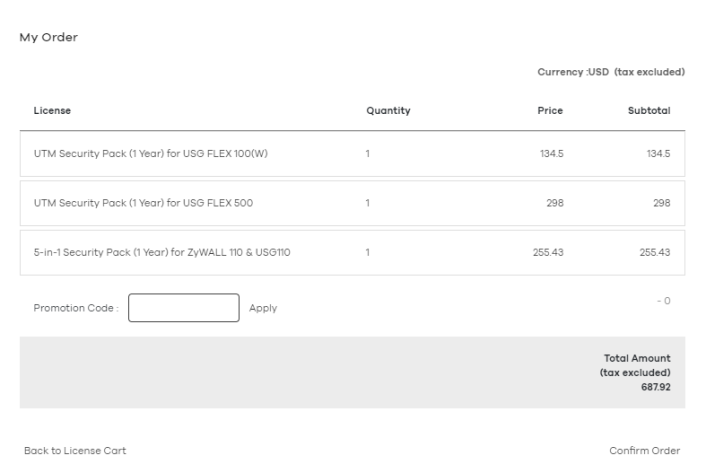
4 Review the order details. Enter a promotion code if you have one. You can leave a note for this order in the Order Reference field. This will appear in your order details for easy finding and future reference. Click Confirm Order.

5 The payment screen displays.
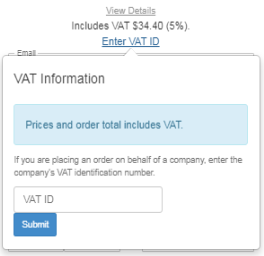
5a Depending on your country, you may enter a VAT number. Click Enter VAT ID.
5b Enter the VAT ID and then click Submit.
Enter the VAT ID and then click Submit.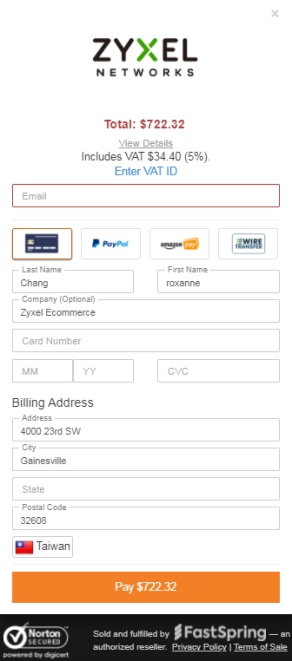
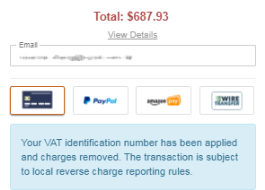
5c Select a payment method, enter your payment details, and then click Pay.
Circle displays an order confirmation screen, and sends a summary of the order and the invoice to your email address. Circle then tries to activate each purchased license on the target Zyxel Device.
Pay As You Go
This section explains what Pay As You Go (PAYG) is and how it works.
PAYG Overview
1 First, go to My Devices > On-cloud to connect Circle to your Nebula account. Then, your On-cloud devices will be imported into Circle.
2 In the My Devices > On-cloud > Pay As You Go > General Settings screen, switch the PAYG button to the right to enable the feature.
3 Agree to the terms and conditions of PAYG.
4 Select the organization you want to set as a PAYG Org.
5 In the payment screen, select a payment method. Enter your payment details.
6 Finally, check whether your PAYG settings are displayed on the My Devices > On-cloud screen.
Introduction to PAYG
Pay As You Go (PAYG) is a new license payment method for specific organizations, known as ‘PAYG Orgs’. Instead of paying in full for a license in advance, you reserve your credit card for future monthly payments.
PAYG is charged for a Gold Security Pack license or a Nebula Professional Pack license for each Zyxel Device in the ‘PAYG Org’. In Circle, you first assign an Org with Zyxel Devices as a ‘PAYG Org’. This Org then becomes a Nebula Pro Org. PAYG is charged for each Zyxel Device you have in the ‘PAYG Org’. All Zyxel Device in a PAYG Org will be charged for at least a Nebula Professional Pack license.
PAYG Billing Policy
The license is charged on the days PAYG is enabled and the Zyxel Device is in the PAYG org. Billing is calculated monthly based on the total number of Zyxel Devices and days in the PAYG org. The total is divided by 31 and rounded up to the nearest whole number for each month.
For example, assume you enable PAYG for your organization during the first week of June, then you disable PAYG. You remove a Zyxel Device on the last day of the first week. You then enable PAYG again in the last week. The Zyxel Devices in the PAYG organization during these periods are shown below.
Zyxel Devices and Days with PAYG Enabled | License | Usage Days | ||
|---|---|---|---|---|
6/1-6/6 (6 days) | 6/7 (1 day) | 6/24-6/30 (7 days) | ||
USG FLEX 200HP | USG FLEX 200HP | USG FLEX 200HP | USG FLEX 200HP/200H Gold Security Pack | 14 days |
USG FLEX 200H | USG FLEX 200H | USG FLEX 200H | USG FLEX 200HP/200H Gold Security Pack | 14 days |
XGS1930-28 | XGS1930-28 | XGS1930-28 | Nebula Professional Pack | 14 days |
WAX510D | WAX510D | WAX510D | Nebula Professional Pack | 14 days |
NWA50AX | NWA50AX | NWA50AX | Nebula Professional Pack | 14 days |
NWA50AX | NWA50AX | Nebula Professional Pack | 7 days | |
FWA505 | Nebula Professional Pack | 6 days | ||
The PAYG billing for June is calculated as follows:
• USG FLEX 200HP/200H Gold Security Pack ($20.26/month)
Total usage days: 14 + 14 = 28 days
Bill for the month: 28 ÷ 31 = 0.90 months, rounded up to 1 month
• Nebula Professional Pack ($2.41/month)
Total usage days: 14 + 14 + 14 + 7 + 6 = 55 days
Bill for the month: 55 ÷ 31 = 1.77 months, rounded up to 2 months
The total billing amount is: ($20.26 × 1) + ($2.41 × 2) = $25.08
You can view the pricing details for different Zyxel Device models in the Pay As You Go Introduction screen. Go to My Devices > On-cloud > Pay As You Go > General Settings, and then click What is Pay As You Go? under Pay As You Go Introduction to view the pricing details.
How to Enable PAYG
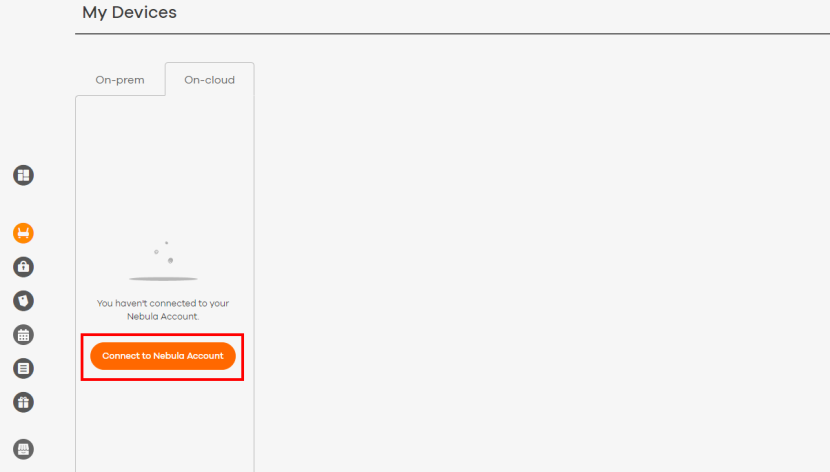
1 Before enabling PAYG, connect your Circle account to your Nebula account. Go to My Devices > On-cloud and click Connect to Nebula Account. Once connected, your On-cloud devices will be imported into Circle.
My Devices > On-cloud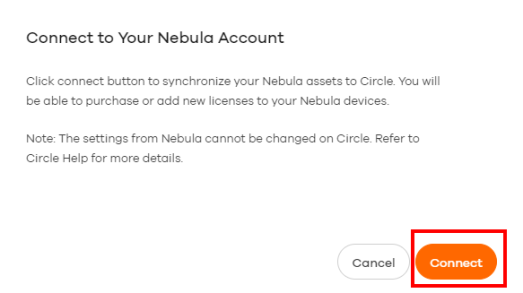
A warning message appears. Click Connect to proceed with the synchronization of your Nebula account.
Connecting to Nebula Account
2 The screen now displays the devices under your Nebula account. Click the Pay As You Go button 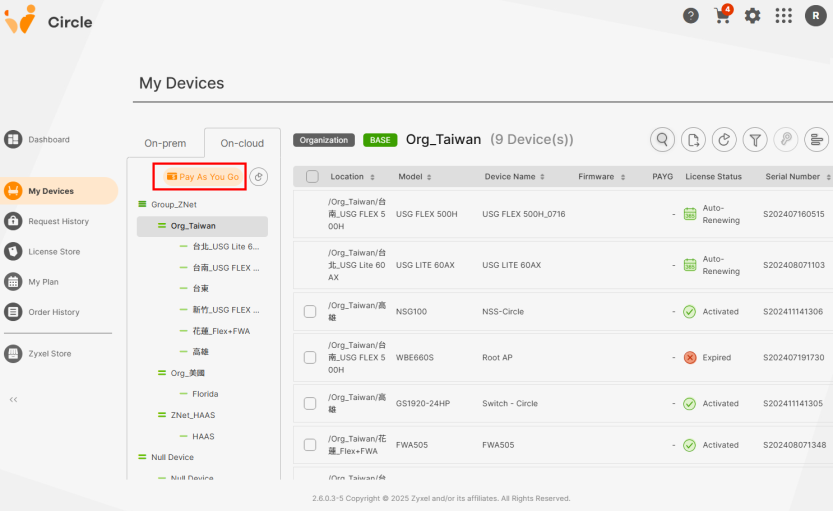 to open the PAYG settings page.
to open the PAYG settings page.My Devices > On-cloud
The following prompt appears if you enable PAYG, but you have not added On-cloud devices from Nebula.
PAYG: Add Device Prompt
3 In the Pay As You Go > General Settings screen, click the Pay As You Go switch 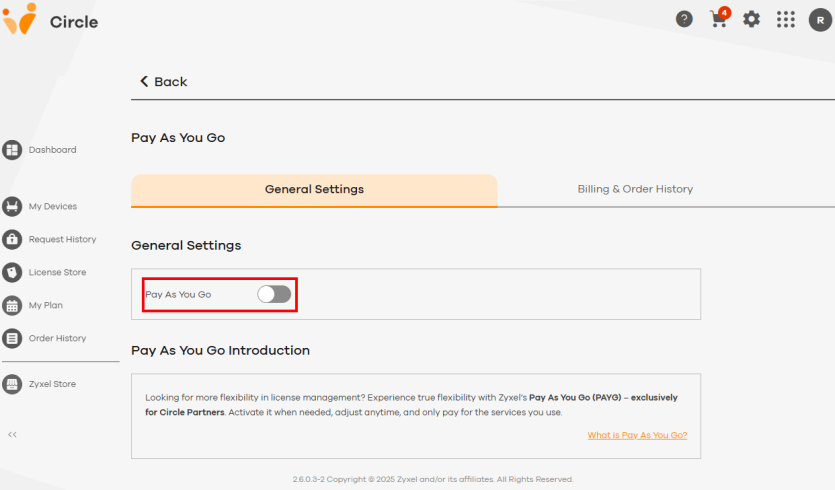 to the right to enable PAYG.
to the right to enable PAYG.My Devices > On-cloud > Pay As You Go > General Settings
4 The Terms and Conditions of PAYG appear. Read them carefully and select the checkbox 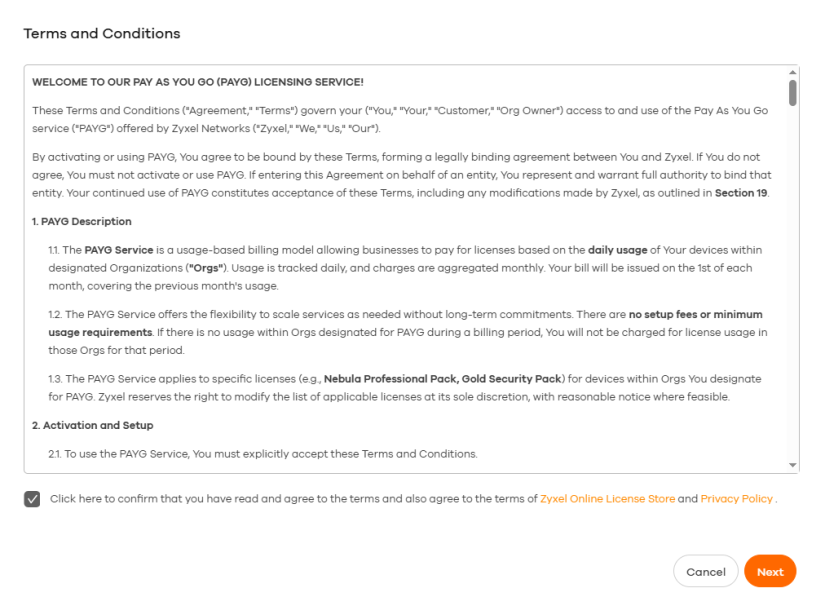 when finished. Then, click Next.
when finished. Then, click Next.My Devices > On-cloud > Pay As You Go > Terms and Conditions
5 After you accept the Terms and Conditions, the Organization List appears. Select one or all organizations to apply PAYG. Click the switch  to the right of the organization you want to set as a PAYG Org.
to the right of the organization you want to set as a PAYG Org.Nebula Professional Pack + Gold Security Pack:
If your Org has firewalls that need the security features (billed for Gold Security Pack) and / or non-firewall devices (billed for Nebula Professional Pack), select the checkbox for the Gold Security Pack.
If your Org has firewalls that need the security features (billed for Gold Security Pack) and / or non-firewall devices (billed for Nebula Professional Pack), select the checkbox
for the Gold Security Pack.Nebula Professional Pack only:
If your Org has firewalls that do not need the security features and / or non-firewall devices (all billed for Nebula Professional Pack only), select only the checkbox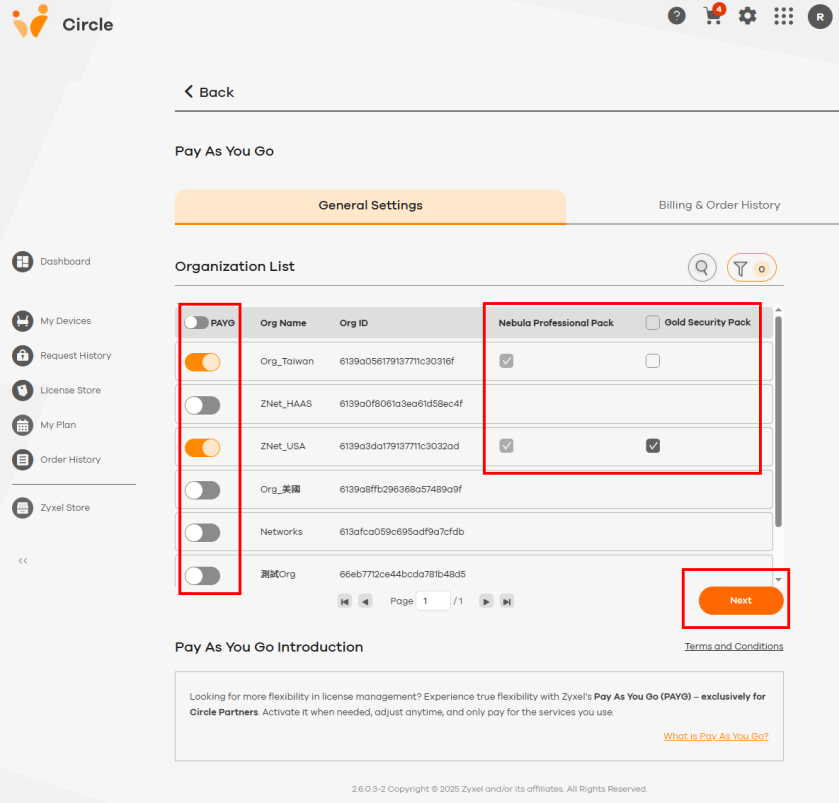 for the Nebula Professional Pack.
If your Org has firewalls that do not need the security features and / or non-firewall devices (all billed for Nebula Professional Pack only), select only the checkbox
for the Nebula Professional Pack.When you are finished with the setup, click Next.
My Devices > On-cloud > Pay As You Go > Organization List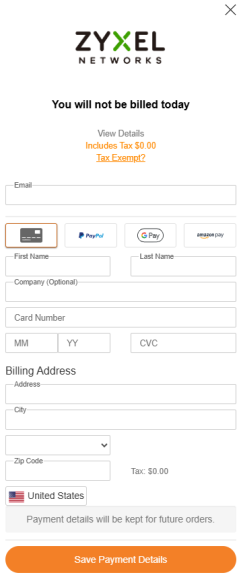
If you add a Zyxel Device with a UTM license to a PAYG organization, the Zyxel Device's license is automatically upgraded to a Gold Security Pack. However, the Zyxel Device is billed only for the Nebula Professional Pack until the existing UTM license expires. After the UTM license expires, PAYG billing switches to the Gold Security Pack rate.
6 The payment screen displays. Select a payment method, enter your payment details. Click Save Payment Details after filling in the information.
PAYG: Payment Information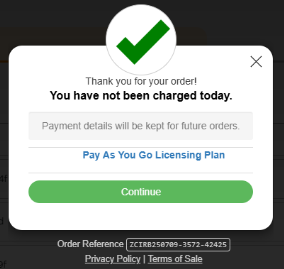
7 A prompt will appear confirming that your payment setup is complete. Click Continue to finish.
PAYG: Payment Setup Completion Prompt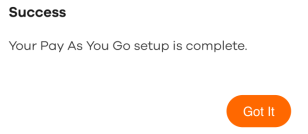
8 The prompt below will appear to inform you that the PAYG setup is complete. Click Got It to finish.
PAYG: Setup Complete Prompt
9 To check if you have set up PAYG successfully, go to My Devices > On-cloud, select the PAYG Org you set up and click the refresh button  . Under PAYG, the icon for Nebula Professional Pack
  or Gold Security Pack
 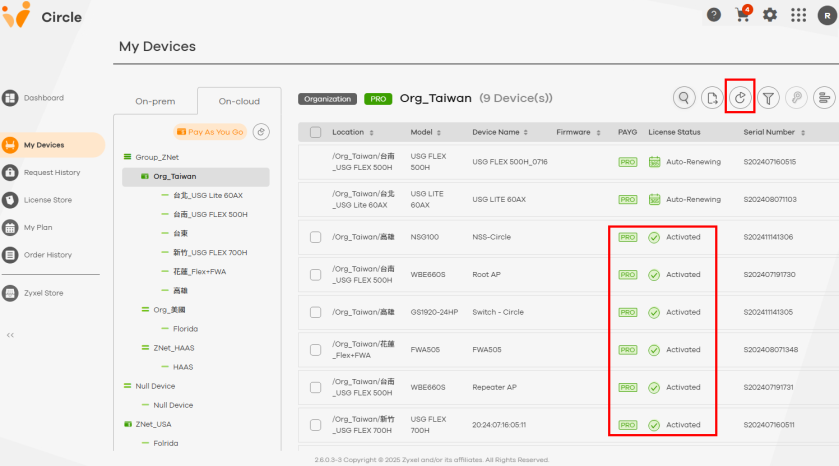 indicates that the Zyxel Device’s PAYG license is currently tracking usage. Zyxel Device licenses in a ‘PAYG Org’ will show Activated under License Status.
. Under PAYG, the icon for Nebula Professional Pack or Gold Security Pack indicates that the Zyxel Device’s PAYG license is currently tracking usage. Zyxel Device licenses in a ‘PAYG Org’ will show Activated under License Status.My Devices > On-cloud > Org_Taiwan: PAYG and License Status
10 If you want to check the remaining days of the licenses for a Zyxel Device, select a Zyxel Device by clicking the 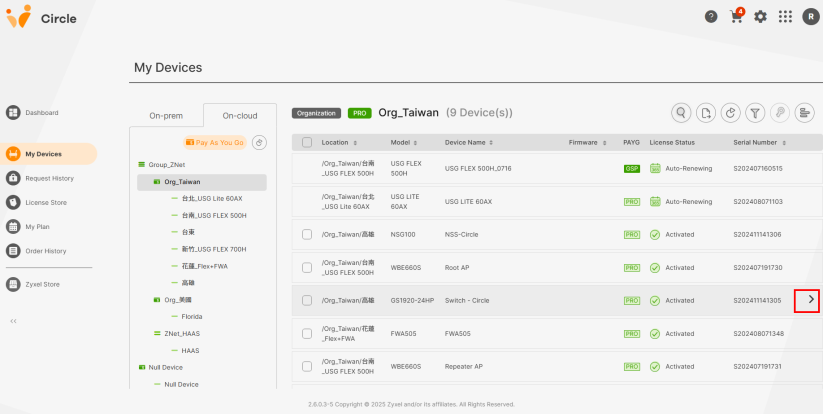 button.
button.My Devices > On-cloud > Org_Taiwan: Check Licenses
How to Check PAYG Status
To check the status of PAYG, go to My Devices > On-cloud > Pay As You Go > General Settings. Use the Pay As You Go switch to check whether it is active. PAYG is active when the switch is turned on. When PAYG is overdue or inactive due to an unpaid balance, a warning message appears on this screen. See My PAYG status shows Overdue. for troubleshooting.
• PAYG is overdue. Click Update Now.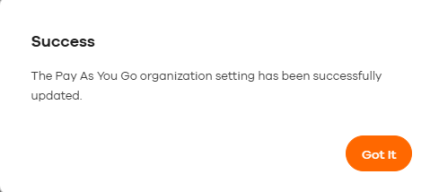
• PAYG is inactive due to an unpaid balance. Click Pay.
How to Change Settings for PAYG Orgs
To change the settings for PAYG Orgs, go to My Devices > On-cloud > Pay As You Go > General Settings.
A grayed-out field indicates that the billing responsibility for this PAYG Org is currently assigned to another Org Owner or Org Delegated Admin. To take over billing responsibility and manage the PAYG settings for this Org, see How to Change Who Pays for a PAYG Org for details.
1 Choose which organizations to enable or disable PAYG for. You can also manage the license pack assigned to each PAYG Org. When finished, click Save in the lower-right corner to apply your settings.
My Devices > On-cloud > Pay As You Go > General Settings: PAYG Org Settings
2 After clicking the Save button, a prompt will appear to confirm the settings for the Organization List. Click Got It to finish.
PAYG: Organization Setting Completion Prompt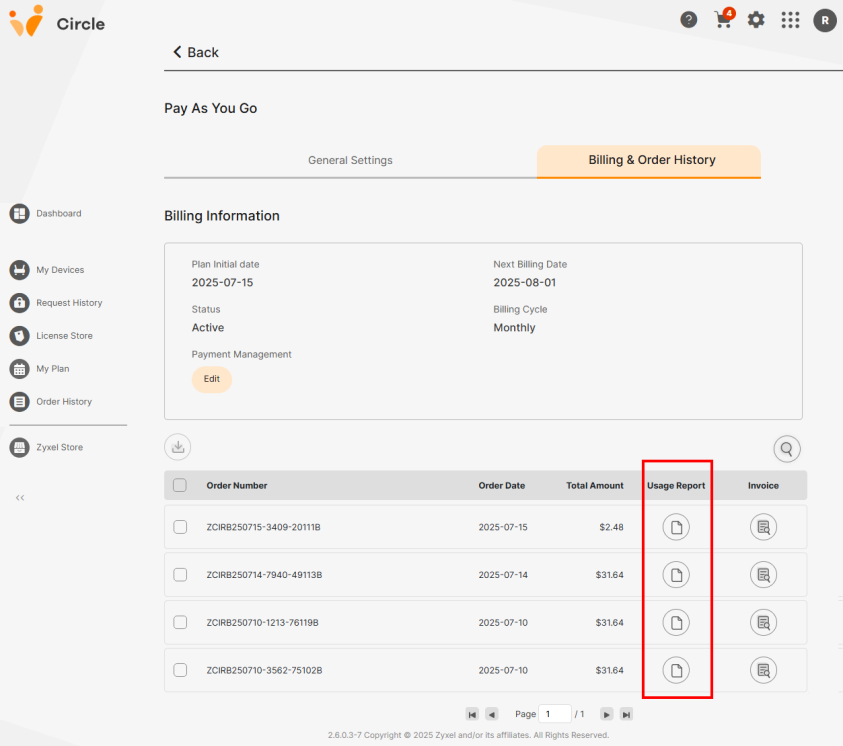
Billing and Order History
To view the billing information and order history for PAYG, go to My Devices > On-Cloud > Pay As You Go > Billing & Order History. The screen below will appear.
My Devices > On-cloud > Pay As You Go > Billing & Order History
Usage Report
Circle charges for PAYG on the 1st of every month. Billing is based on usage time. Circle sums the usage of all licenses in PAYG Orgs.
To download the usage report for each order, click the 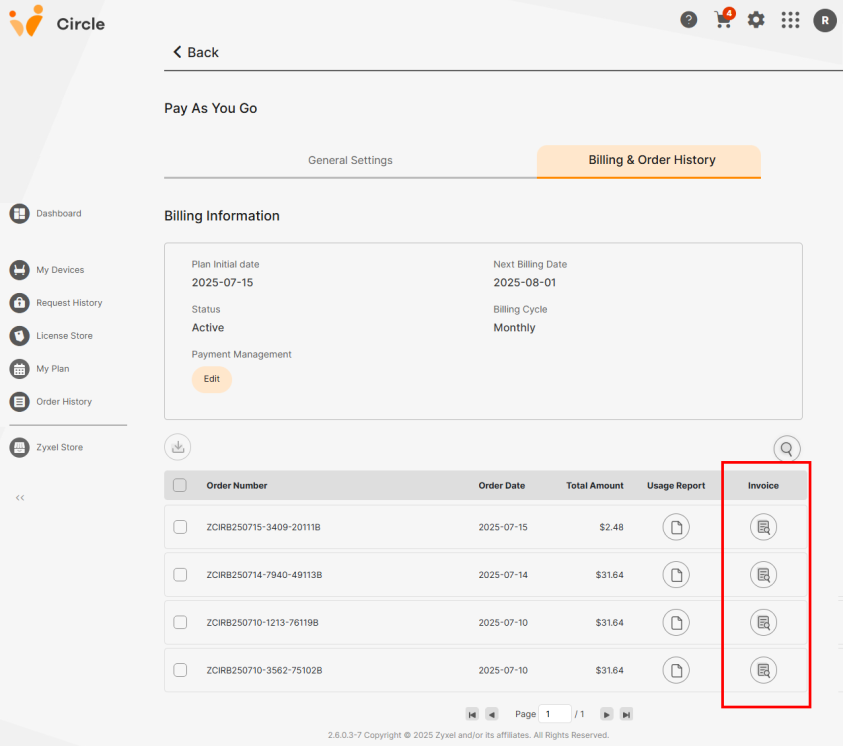 button under Usage Report.
button under Usage Report.My Devices > On-cloud > Pay As You Go > Billing & Order History: Usage Report 
Below is an example of the usage report.
Device Name | Model | s/n | mac | Org Name | Org ID | Site Name | Part Number (P/N) | License Number | Usage (Days) |
|---|---|---|---|---|---|---|---|---|---|
Device A | NWA50AX | S202601xxxxxx | 00:AA:BB:CC:DD:EE | TW Office | 11 | Cafe | LIC-NPRO-ZZ1M00F | Nebula Professional Pack License (1 Month) for Nebula Devices | 31 |
Device B | NW50AX | S202601xxxxxx | 00:AA:BB:CC:DD:FF | TW Office | 11 | Cafe | LIC-NPRO-ZZ1M00F | Nebula Professional Pack License (1 Month) for Nebula Devices | 9 |
Device C | GS1350-18HP | S202601xxxxxx | 00:AA:BB:CC:DD:GG | TW Office | 22 | Cafe | LIC-NPRO-ZZ1M00F | Nebula Professional Pack License (1 Month) for Nebula Devices | 26 |
Device D | USG FLEX 200 | S202601xxxxxx | 00:AA:BB:CC:DD:HH | US Office | 22 | Shop | LIC-GOLD-ZZ1M25F | USG FLEX 200; Gold Security Pack; 1MO; Pay As You Go | 17 |
Invoice
To download the invoice for each order, click the  button under Invoice.
button under Invoice.My Devices > On-cloud > Pay As You Go > Billing & Order History: Invoice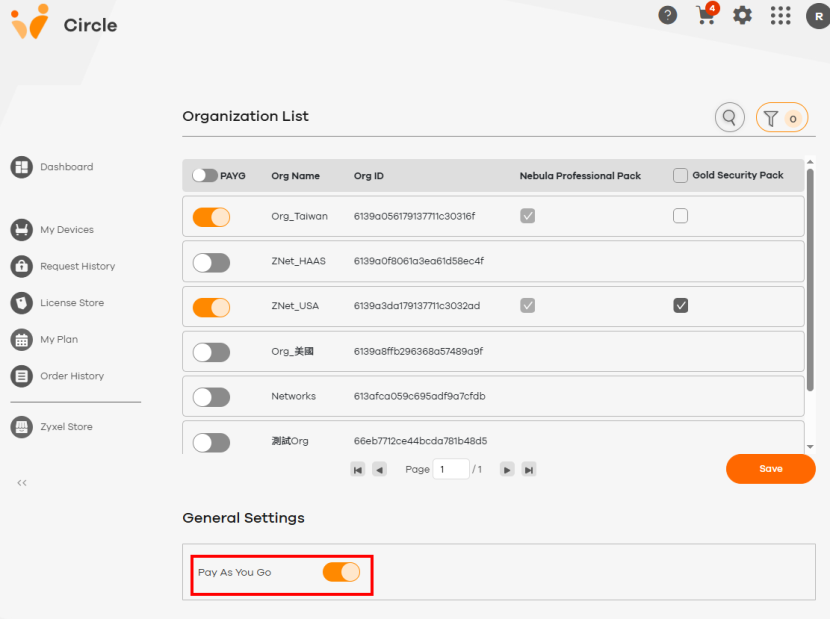
Below is an example of the invoice of PAYG:
• The Nebula Pro Pack costs $1 per month. You used 2 Nebula Pro Packs for the On-cloud devices.
• The Gold Security Pack for the USG FLEX 100H costs $5 per month. You used 1 Gold Security Pack for the USG FLEX 100H.
• The Gold Security Pack for the USG FLEX 200H costs $10 per month. The quantity used is 2. You used 2 Gold Security Packs for the USG FLEX 200H.
• Total for this month is $1*2 + $5*1 + $10*2 = $27 + Tax
PAYG: Invoice Example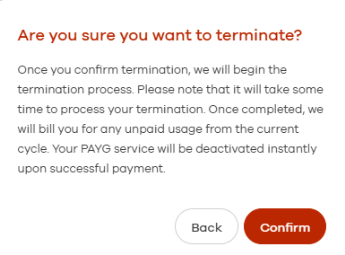
How to Terminate PAYG
If you terminate PAYG, Circle will request full payment immediately. In this case, you have 24 hours to complete the payment.
1 To terminate PAYG, go to My Devices > On-cloud > Pay As You Go > General Settings. In the below screen, click the Pay As You Go switch 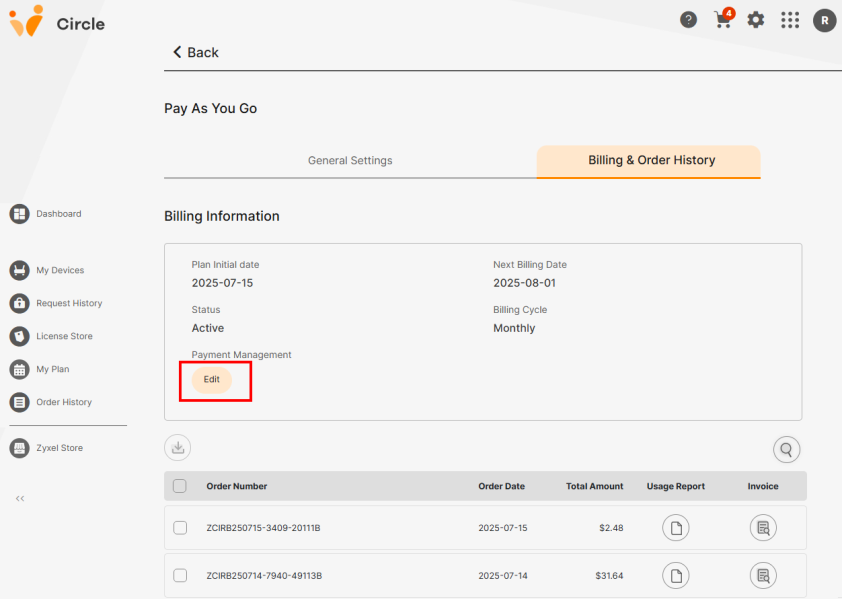 to the left.
to the left.My Devices > On-cloud > Pay As You Go > General Settings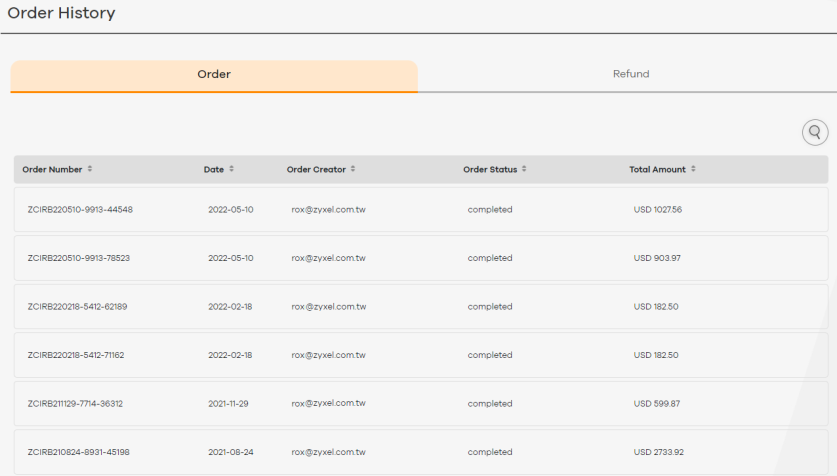
2 A confirmation prompt appears. Note that once you terminate the PAYG contract, Circle will charge you for any unpaid usage. Read the message carefully and click Confirm.
PAYG: Termination Prompt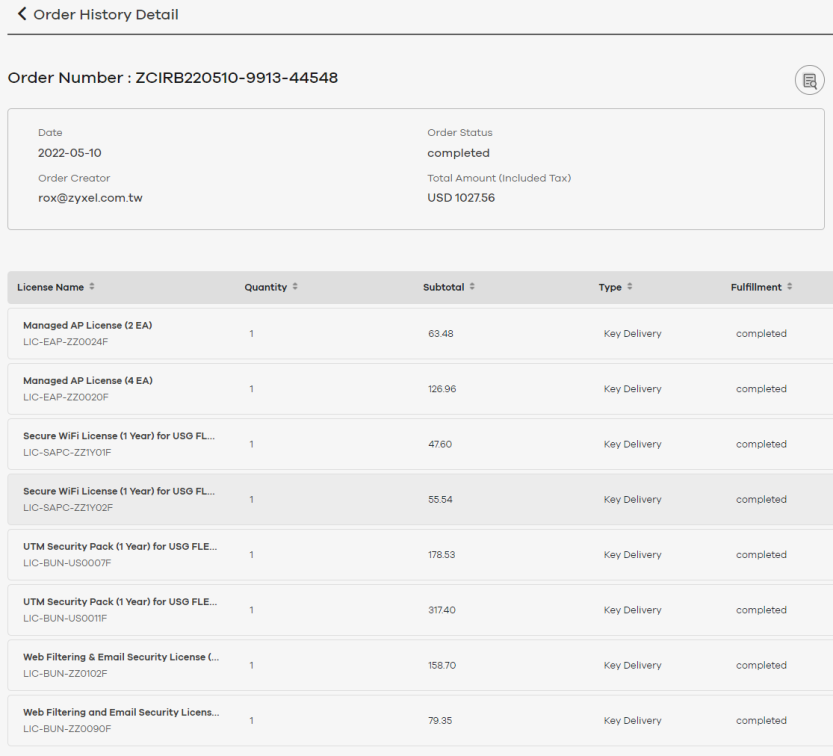
How to Update Your Payment Details
1 To update the payment information for PAYG, go to My Device > On-cloud > Pay As You Go > Billing & Order History. Click Edit in My Plan.

2 Click Edit to update your payment information.

How to Change Who Pays for a PAYG Org
A PAYG Org can be managed and paid for by only one Org Owner or Org Delegated Admin at a time. An Organization owner or delegated admin can take over the PAYG payment of a PAYG Org that is currently paid for by another user. Only the payer can manage the PAYG settings of the organization.
To take over PAYG payment, you first need to enable PAYG in Circle and configure the required settings. See How to Enable PAYG for details.
Billing Rule
When the payer changes, billing is updated according to the following rules:
• Billing charges are determined by the payer's Partner Level. Switching the payer may result in different charges. Click Settings in the title bar to check the level.
• The new payer starts paying on the day they take over the PAYG management.
• If multiple users take over PAYG management for a PAYG Org on the same day, the last confirmed user becomes responsible.
Example:
• 1/1: User A activates PAYG for Org ABC.
• 1/25: User D takes over the PAYG payment.
Billing Charges on 2/1:
• User A’s invoice: Usage from 1/1 to 1/24 is charged according to User A’s Partner Level.
• User D’s Invoice: Usage from 1/25 to 1/31 is charged according to User D’s Partner Level.
Follow the steps below to take over PAYG payment and manage the PAYG settings for the PAYG Org.
1 Go to My Device > On-cloud > Pay As You Go. Click the Switch Payer button for the PAYG Org you want to take over. Click Save.

2 Click Confirm.
Viewing Order Information
After creating an order to buy licenses, you can view detailed information about the order on the Order History screen.
1 Go to Order History.

2 Locate an order, and then click >. The Order History Details screen opens.

3 View the following information:
.
Label | description |
|---|---|
Order Number | This displays a unique code that identifies the order. |
View Invoice | Click this to download the order invoice. |
Date | This displays the date that the order was created. |
Order Creator | This displays the email address of the user account that created the order. |
Order Status | This displays the current status of the order. • completed: The order has been paid for. |
Total Amount | This displays the total cost of the order. This total is equal to the sum of all licenses in the order, plus tax, minus any discounts. |
License Name | This displays a list of the individual licenses and license packs in the order. |
Quantity | This displays the number of licenses ordered for the specified license type. |
Subtotal | This displays the cost of an individual license within the order. |
Type | This displays Auto activation or Key Delivery. • Auto Activation means you bought licenses directly for Zyxel Devices using either Renew License (select Zyxel Devices first) or Subscription Alignment (select an organizational unit first). • Key Delivery means you bought the license from the License Store to apply (redeem) to a Zyxel Device later. |
Fulfillment | This displays the status of each license within the order. • completed: The license was successfully activated on the target Zyxel Device. • failed: The license was not successfully activated on the target Zyxel Device. • processing: The license activation on the target Zyxel Device is still under process. |
License Key | Hover your mouse over a license and click this icon to open the License Keys window. You can copy the key to use when redeeming a license for your Zyxel Device. You can also export the license information and key to an Excel file if you want to transfer the license for others to use. |
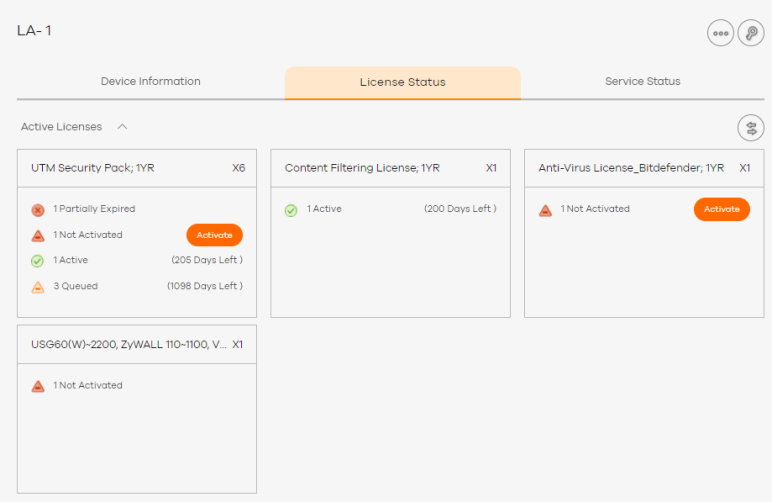
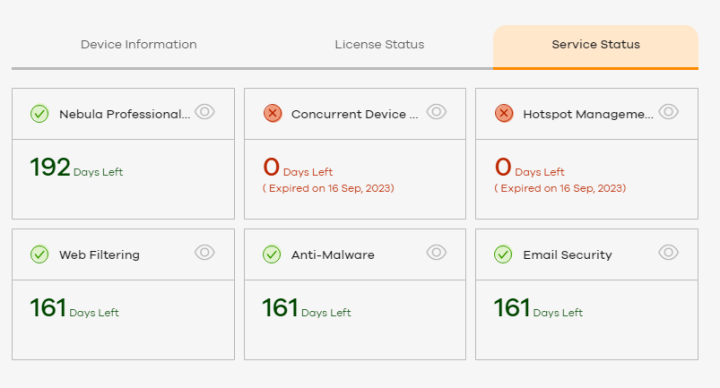
Viewing Device License Status
The License Status screen displays detailed information about the licenses of a specific Zyxel Device. You can also hide or show the license here to specify which license status will be shown on the My Devices screen for overall license status.
1 Go to My Devices. Locate and then click a Zyxel Device.
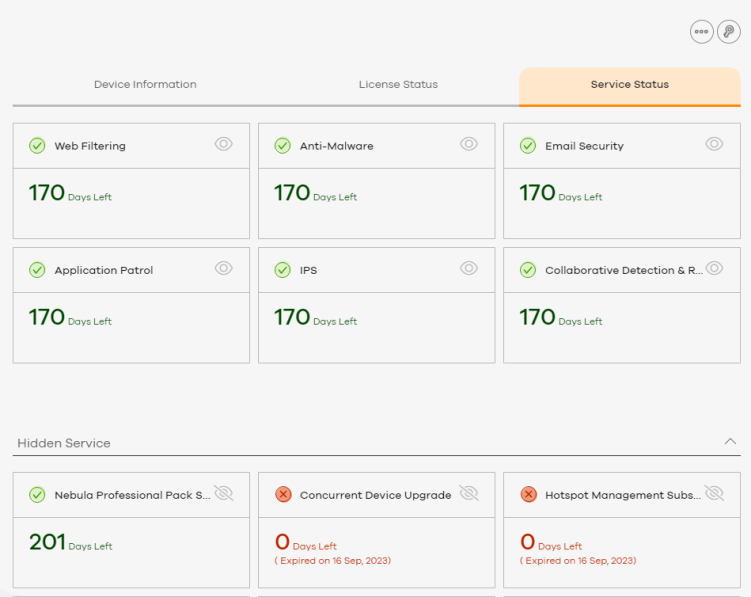
2 Click License Status.

You can view the expiration date and the number of days remaining.
If a Zyxel Device has two identical license types, the remaining days displayed are the sum of both licenses. For example, if a Zyxel Device has a Gold Security Pack 1-year license with 32 days remaining and a queued Gold Security Pack 1-month license, the remaining days displayed are 62.
The information below describes the meaning of each license status Icon.
 | Activated | The license has been activated on the Zyxel Device. Each service can only have one activated license at a time. |
 | Expiring Soon | The remaining valid time of the license is 90 days or less. |
 | Expired | The license has expired. Refer to Redeeming License Keys on a Single Device to redeem a license you bought to the Zyxel Device. Refer to Buying or Renewing Licenses for a Single Device to buy and apply a license to the Zyxel Device. |
 | Auto-Renewing | The license has been activated and will be automatically renewed. |
 | Deferred | The license has been activated, but there is an existing activated license for the same service on the Zyxel Device. The Zyxel Device only starts using the license after the existing license has expired. |
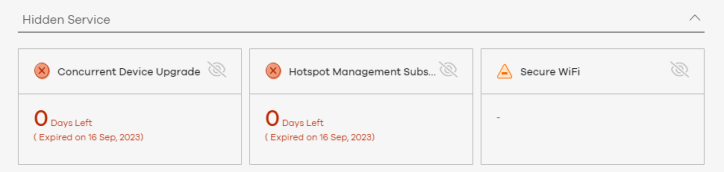
Hide/Show License
If there are 20 licenses on your Zyxel Device, the My Devices screen displays only one license’s status as the overall status.
The displayed overall license status is based on the license display priority defined by Circle. If you prefer that a certain license not affect the determination, you can use the Hide button to exclude the license from the determination list. Circle will ignore the hidden license when deciding which license’s status to show on the My Devices screen.
Follow these steps to hide your Zyxel Device’s license status.
1 Go to My Devices. Click the Zyxel Device for which you want to hide the license.
2 Go to the License Status tab. Click Hide.
3 The license you hide is now listed under Hidden License on this screen. Click the arrow to view the hidden licenses.

4 You can go back to the My Devices screen to view the license status of your Zyxel Device. The License Status now shows Activated.

5 To include a license to this determination list again, click the Show button for that license in the Zyxel Device’s License Status tab.

Add or Edit a Reference Note for a Finished Order
You can leave a reference note on an order to record information for future reference, such as the client’s name or the Zyxel Device serial numbers. This note will appear in the order details. You can also search for this note using the search icon in the Order History.
Add or edit the reference note for a finished order with the steps below:
1 Go to Order History > Order.
2 Hover over the order you want to add or edit a reference note for.
3 Click the Order Reference icon.

4 Add or edit the Order Reference for this order. Click Done.

5 You can now see the Order Reference you created.

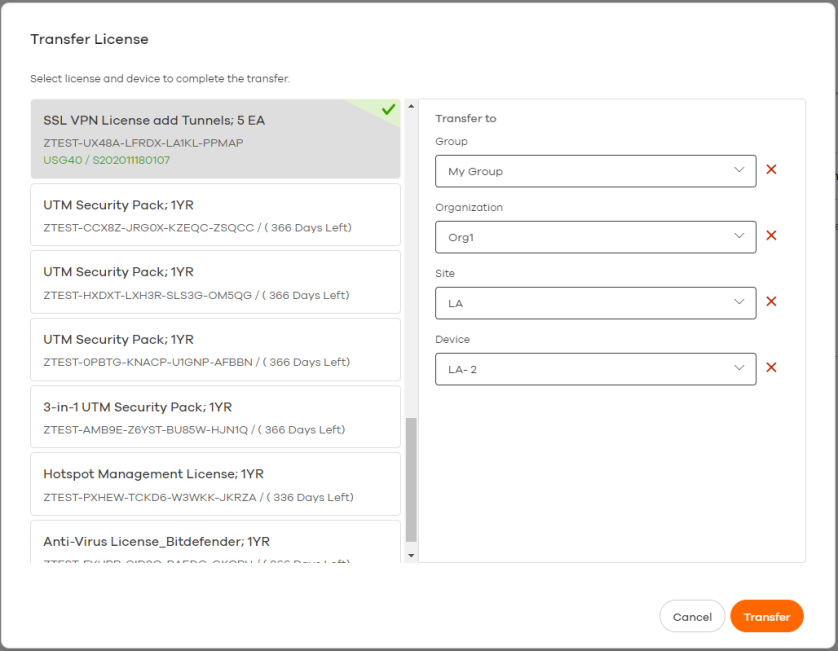
Transfer a Device License
The Transfer License icon  is supported in the License Status screen in On-prem mode only, not On-cloud mode.
is supported in the License Status screen in On-prem mode only, not On-cloud mode.1 Go to My Devices. Locate and then click a Zyxel Device to display the following screen.

2 Click License Status.
 .
.3 Click the Transfer License icon  .
.
.4 Select the license you want to transfer and then select the target site and Zyxel Device. Make sure your selection is correct, then click Transfer.

Subscription Alignment
Subscription alignment allows you to renew all of the Zyxel licenses within a organizational unit (site, organization, or group), so that licenses expire on the same date if the original expiration dates are the same, or within a month if the original expiration dates are different. This helps simplify license management and payment.
• In On-prem mode, you can align license subscriptions for all Zyxel Devices in an organization, a site or group.
• In On-cloud mode, you can align license subscriptions for all Zyxel Devices in an organization, but not a site nor a group.
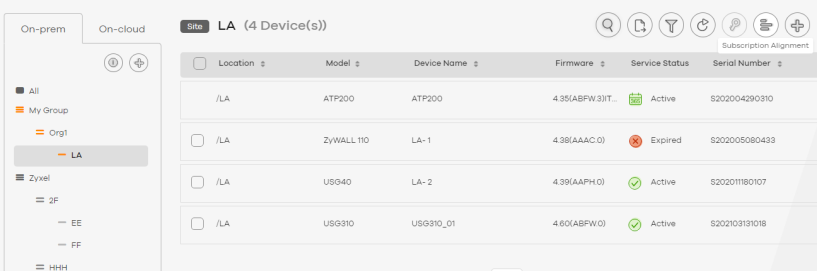
Performing Subscription Alignment in On-prem Mode
Follow these steps to perform subscription alignment.
1 Go to My Devices. In On-prem mode, select an organization, a site or group and then click Subscription Alignment.
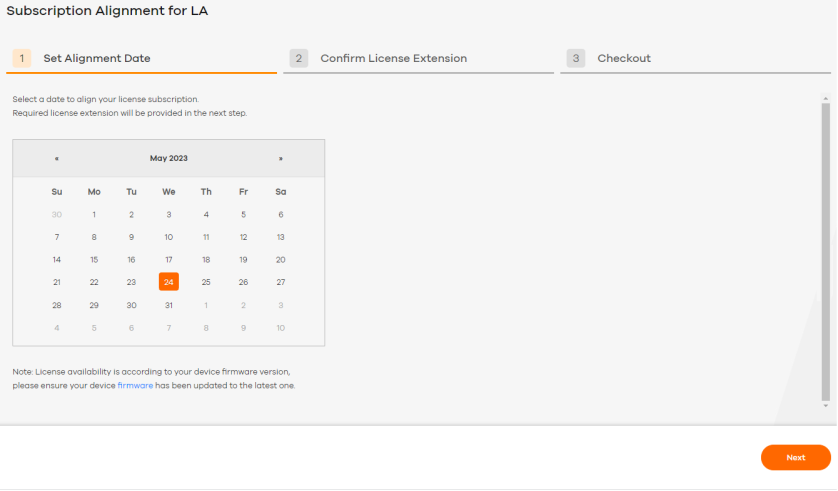
2 Select an alignment date, and then click Next.
All licenses will be renewed in increments of one month, so that they expire within one month of this date.
All licenses will be renewed in increments of one month, so that they expire within one month of this date.
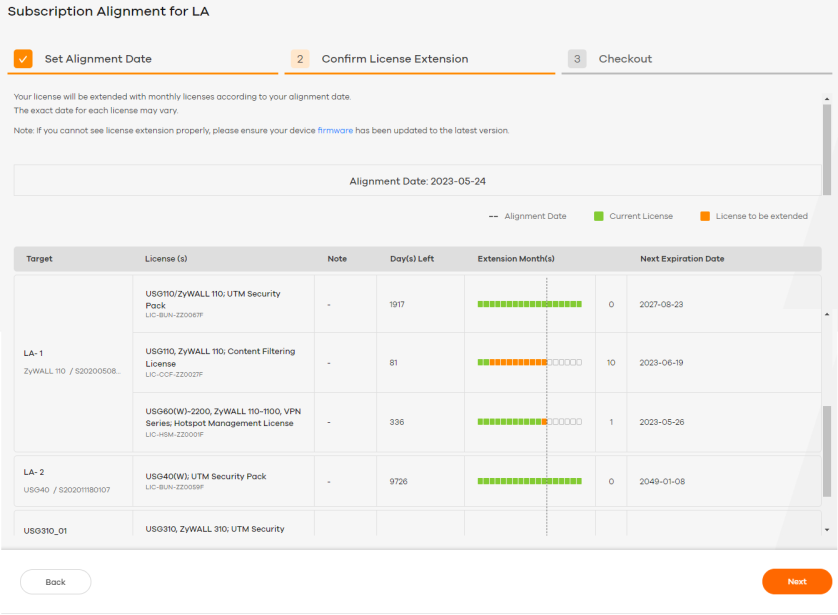
3 Review the extension time of each license. Remove any licenses that you do not want to align, by moving the pointer over a license and then clicking the Remove icon. Then click Next.
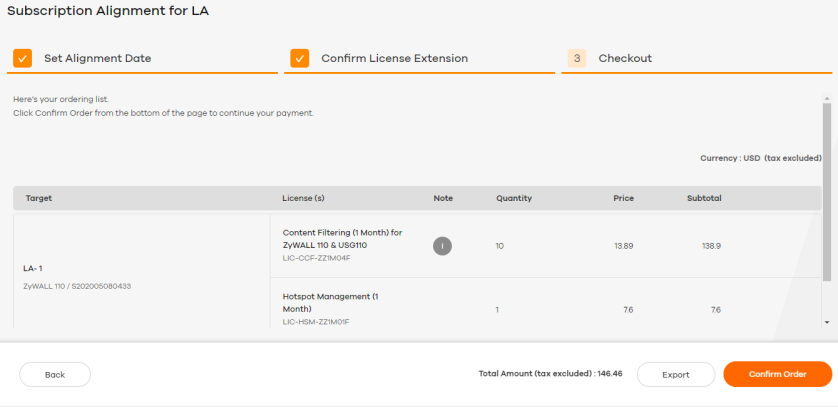
4 Review the cost of renewing each license, and the total cost of the order. Remove any licenses that you do not want to purchase by moving the pointer over a license and then clicking the Delete icon. Then click Confirm Order.
5 Enter a coupon code, if you have one. Then click Confirm Order.
A subscription alignment order is created. Follow the prompts to pay. For details on paying for an order, see Paying for an Order.
Performing Subscription Alignment in On-cloud Mode
Follow these steps to perform subscription alignment in On-cloud mode.
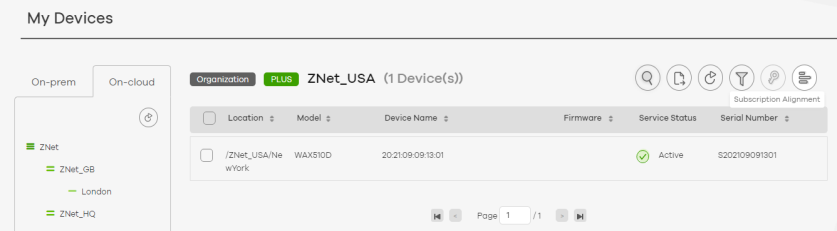
1 Go to My Devices and click On-cloud. In On-cloud mode, select an organization and then click Subscription Alignment.

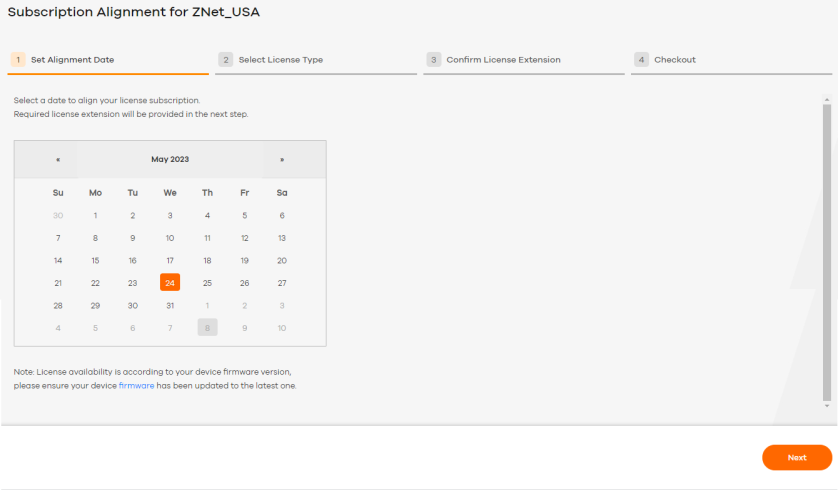
2 Select an alignment date, and then click Next.
All licenses will be renewed in increments of one month, so that they expire within one month of this date.
All licenses will be renewed in increments of one month, so that they expire within one month of this date.
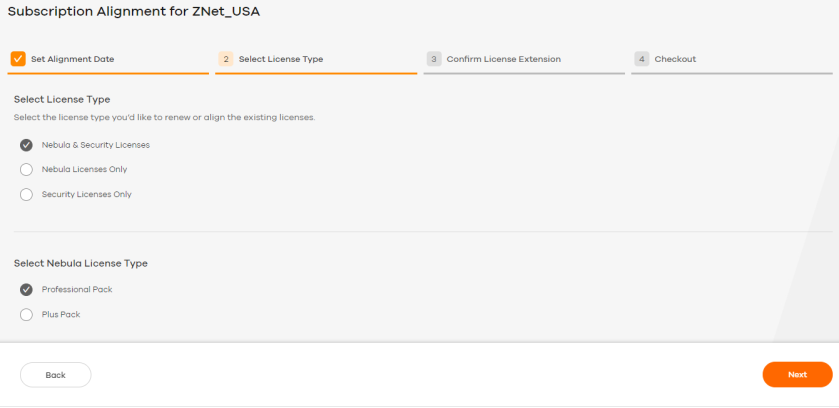
3 Select the license type that you want to align. If the selected organization has both Nebula and Security Zyxel Devices, you can renew and align either type licenses or both.
For the Nebula Licenses, if the license for the selected organization is Nebula Base, you can upgrade the license to a Nebula Plus or Nebula Pro pack. If the selected organization already has a Nebula Plus or Nebula Pro pack, then you can renew and align the same pack type, but not change from one pack to the other. For example, you cannot upgrade from the Nebula Plus pack to the Nebula Pro pack while aligning licenses.
For the Nebula Licenses, if the license for the selected organization is Nebula Base, you can upgrade the license to a Nebula Plus or Nebula Pro pack. If the selected organization already has a Nebula Plus or Nebula Pro pack, then you can renew and align the same pack type, but not change from one pack to the other. For example, you cannot upgrade from the Nebula Plus pack to the Nebula Pro pack while aligning licenses.
4 Review the extension time of each license. Remove any licenses that you do not want to align, by moving the pointer over a license and then clicking the Remove icon. Then click Next.
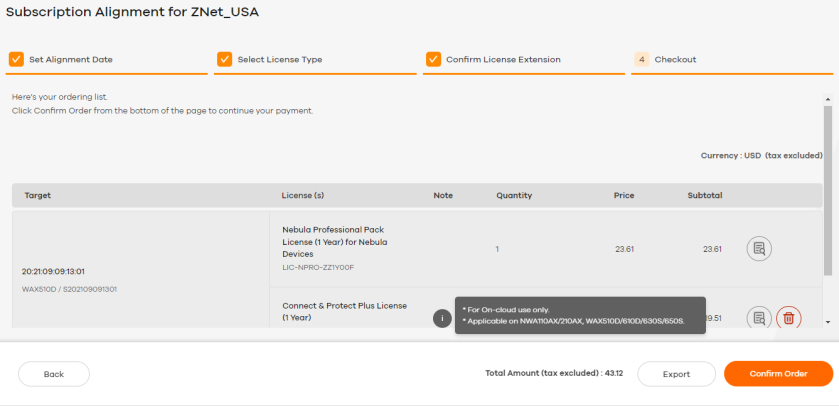
5 Review the cost of renewing each license, and the total cost of the order. Remove any licenses that you do not want to purchase by moving the pointer over a license and then clicking the Delete icon. Then click Confirm Order.

6 Enter a coupon code if you have one. You can leave a note for this order in the Order Reference field. This will appear in your order details for easy finding and future reference. Click Confirm Order.
A subscription alignment order is created. Follow the prompts to pay. For details on paying for an order, see Paying for an Order.